Database Node
The Database node lets your workflow talk directly to relational databases. By providing the connection details and SQL statement, you can pull live business data, build reports, or write AI-generated content back into existing systems without leaving FlowAI.
When to Use
- Fetch live records: Query CRM, order, or inventory data for downstream analysis or prompts.
- Write workflow output: Store summaries, decisions, or generated content back in your database.
- Automated checks: Schedule health checks or statistics and pair them with alert nodes.
- Variable-driven queries: Reference upstream outputs inside SQL to build dynamic filters or statements.
Node Configuration
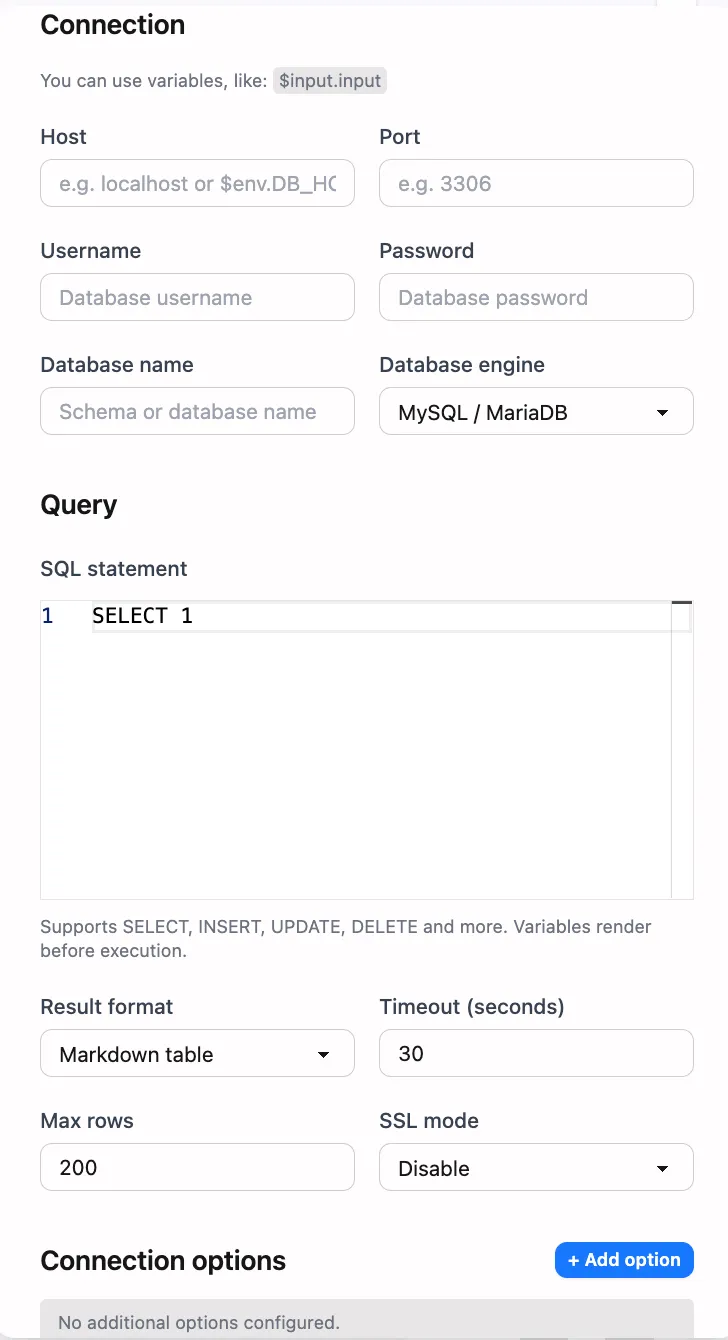
Connection Basics
-
Node name
- Choose a descriptive label, such as “Fetch Orders” or “Store Report”.
- Downstream nodes can access the result via
$NodeName.result.
-
Database type
- Currently supports
MySQLandPostgreSQL. - FlowAI selects the proper connection routine based on this field.
- Currently supports
-
Host and port
hostaccepts an internal hostname or public IP.portis optional; leave blank to use the database default.
-
Database and credentials
databasesets the target schema.usernameandpasswordmust have the required permissions.- Prefer scoped read-only or least-privilege accounts for safety.
-
Variable interpolation
- Any input field supports FlowAI variables, such as
$Start.data.host. - Values are resolved before connecting, enabling fully dynamic setups.
- Any input field supports FlowAI variables, such as
SQL and Output Format
-
SQL statement
- Provide the command in the
sqlfield. - The node automatically classifies statements as query or non-query.
- Query statements (for example
SELECT,SHOW,WITH) return a result set; other statements return execution metadata.
- Provide the command in the
-
Result format
- Markdown tables are the default, great for direct display or notifications.
- Set
formattojsonto receive a structured payload containingcolumns,rows, andtruncated, which is ideal for further automation.
-
Row limit
max_rowscaps the number of returned rows (200 by default, capped at 5000).- When the limit is exceeded, the node truncates the result and marks it accordingly.
Timeout and Advanced Options
-
Execution timeout
timeout_secondsdefines the maximum runtime for a single execution (30 seconds by default).- Running longer than this limit cancels the task and reports an error to prevent stalled workflows.
-
SSL and extra parameters
- PostgreSQL connections can set
ssl_mode(for instancedisable,require). - Use the
optionsmap to append extra connection parameters, e.g.{ "timezone": "UTC" }.
- PostgreSQL connections can set
-
Connection reliability
- The node verifies connectivity before running the statement and immediately reports failures.
- Pair it with loops or condition nodes if you need custom retry policies.
Node Outputs
$NodeName.result: Returned when the statement succeeds.- Query statements output a Markdown table by default, or
{ columns, rows, truncated }when using JSON mode. - Write/update statements provide metadata such as
rows_affectedand, when available,last_insert_id.
- Query statements output a Markdown table by default, or
$NodeName.error: Populated with the error message on failure and cleared on success, making it easy to branch with condition nodes.
Use the result downstream like this:
Latest orders:{{$FetchOrders.result}}With JSON output, downstream nodes should read $FetchOrders.result and perform any needed parsing internally.
Examples
Example: Read the latest orders
-
Configure the Database node with:
host: db.internal.localdatabase: salestype: mysqlusername: report_readerpassword: ******sql: SELECT id, customer, total_amount FROM orders ORDER BY created_at DESC LIMIT 10;format: markdown table -
Name the node “Fetch Orders” and insert
$FetchOrders.resultin a notification or LLM node to show the latest records. -
To filter by date, inject a variable from an upstream node, such as
... WHERE created_at >= '{{ $TimeNode.result }}'.
Example: Write workflow execution logs
-
Store the generated summary from an upstream LLM node as
$Summary.result. -
Configure the Database node with:
sql: INSERT INTO workflow_logs (workflow_id, summary, created_at)VALUES ({{ $WorkflowInfo.id }}, '{{ $Summary.result }}', NOW());format: json -
After execution, review
$WriteLog.resultto confirm the insert and trigger follow-up steps.
Best Practices
- Scoped accounts: Use accounts limited to the specific schemas and operations you need.
- Manage result size: Combine
max_rowswith SQLLIMITclauses to stay efficient. - Monitor errors: Route
$NodeName.errorinto condition or notification nodes for faster troubleshooting. - Cache where helpful: Pair the Database node with variable or JSON-processing nodes to reuse repeated query results.
- Review timeouts: Frequent timeouts generally indicate a query or indexing issue that should be optimized.
Need a Custom AI Agent?
Custom AI agents designed for real-world business operations.