FlowAI Quick Start
Quick Start: Create Your First AI Workflow
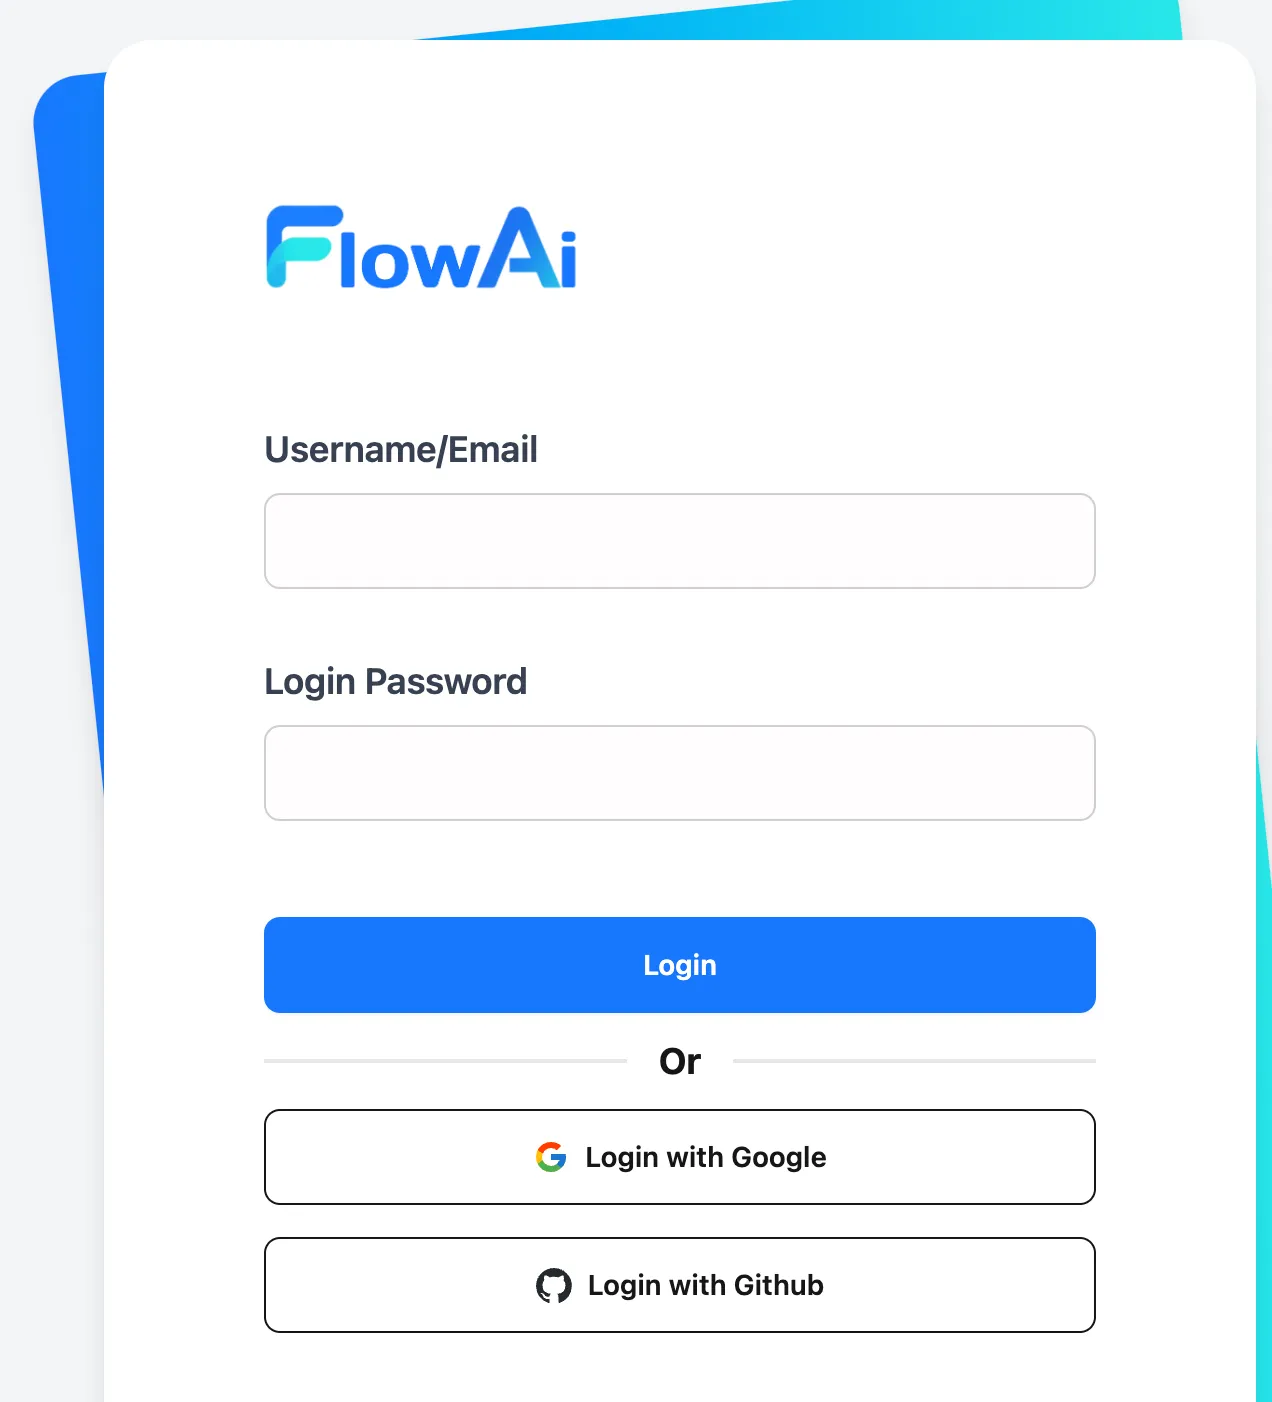
1. Log in to FlowAI Platform
- Open your browser and visit FlowAI Platform
- Click the Login/Register button at top-right. Existing users can enter email/password. New users can sign up with GitHub or Google (e.g. click Sign in with Google).
2. Create Workflow from Scratch
2.1 Create New Workflow
First-time users will see a welcome page - click Create Workflow.
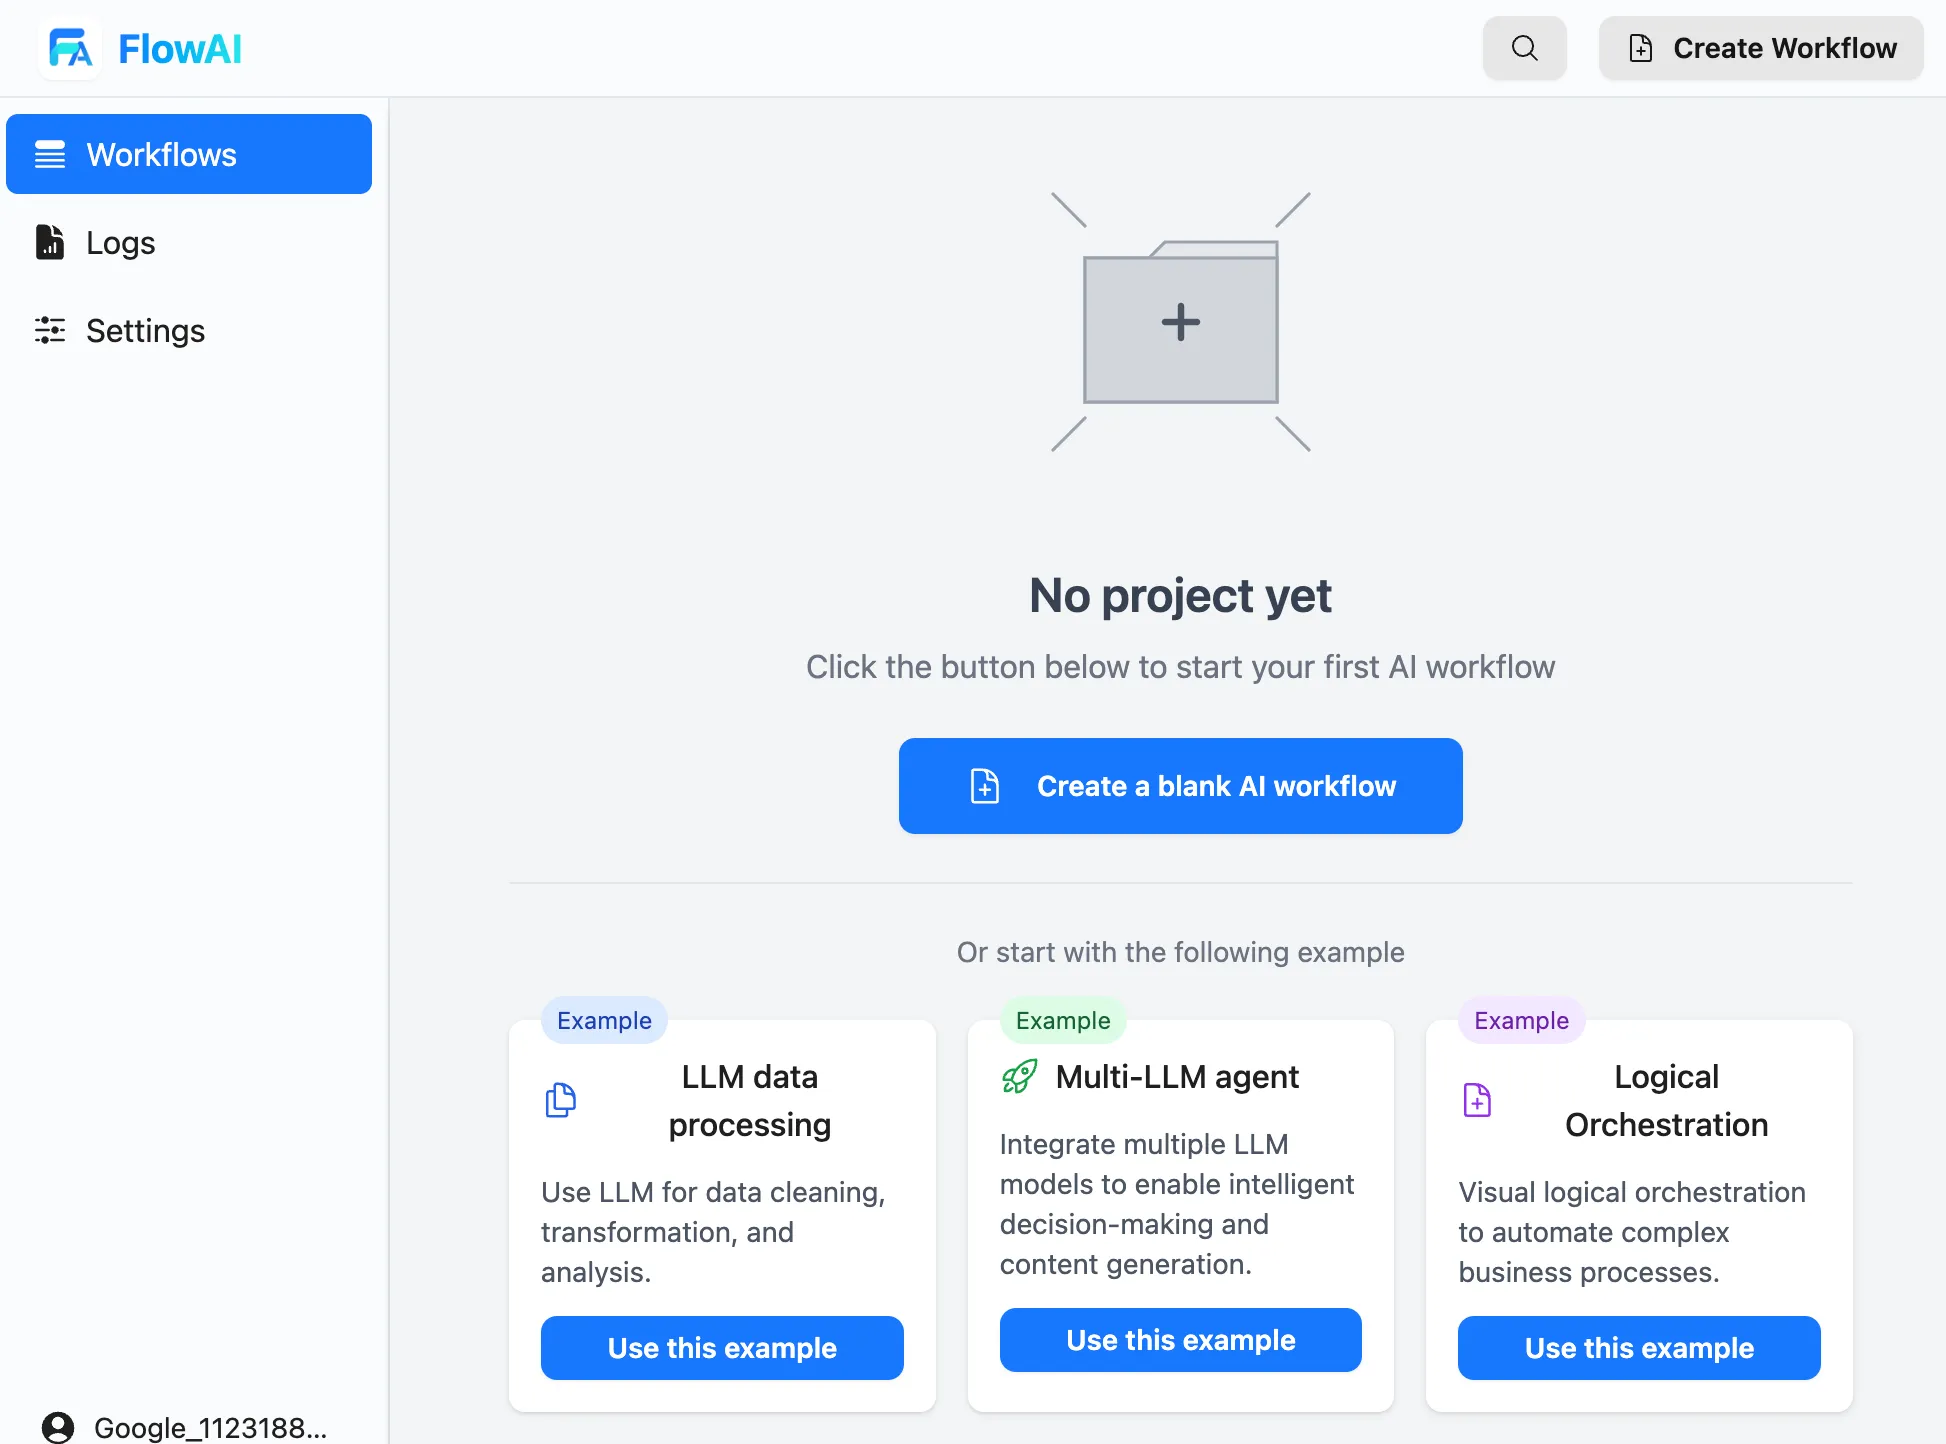 Existing users can click New Workflow from any page in the FlowAI Dashboard.
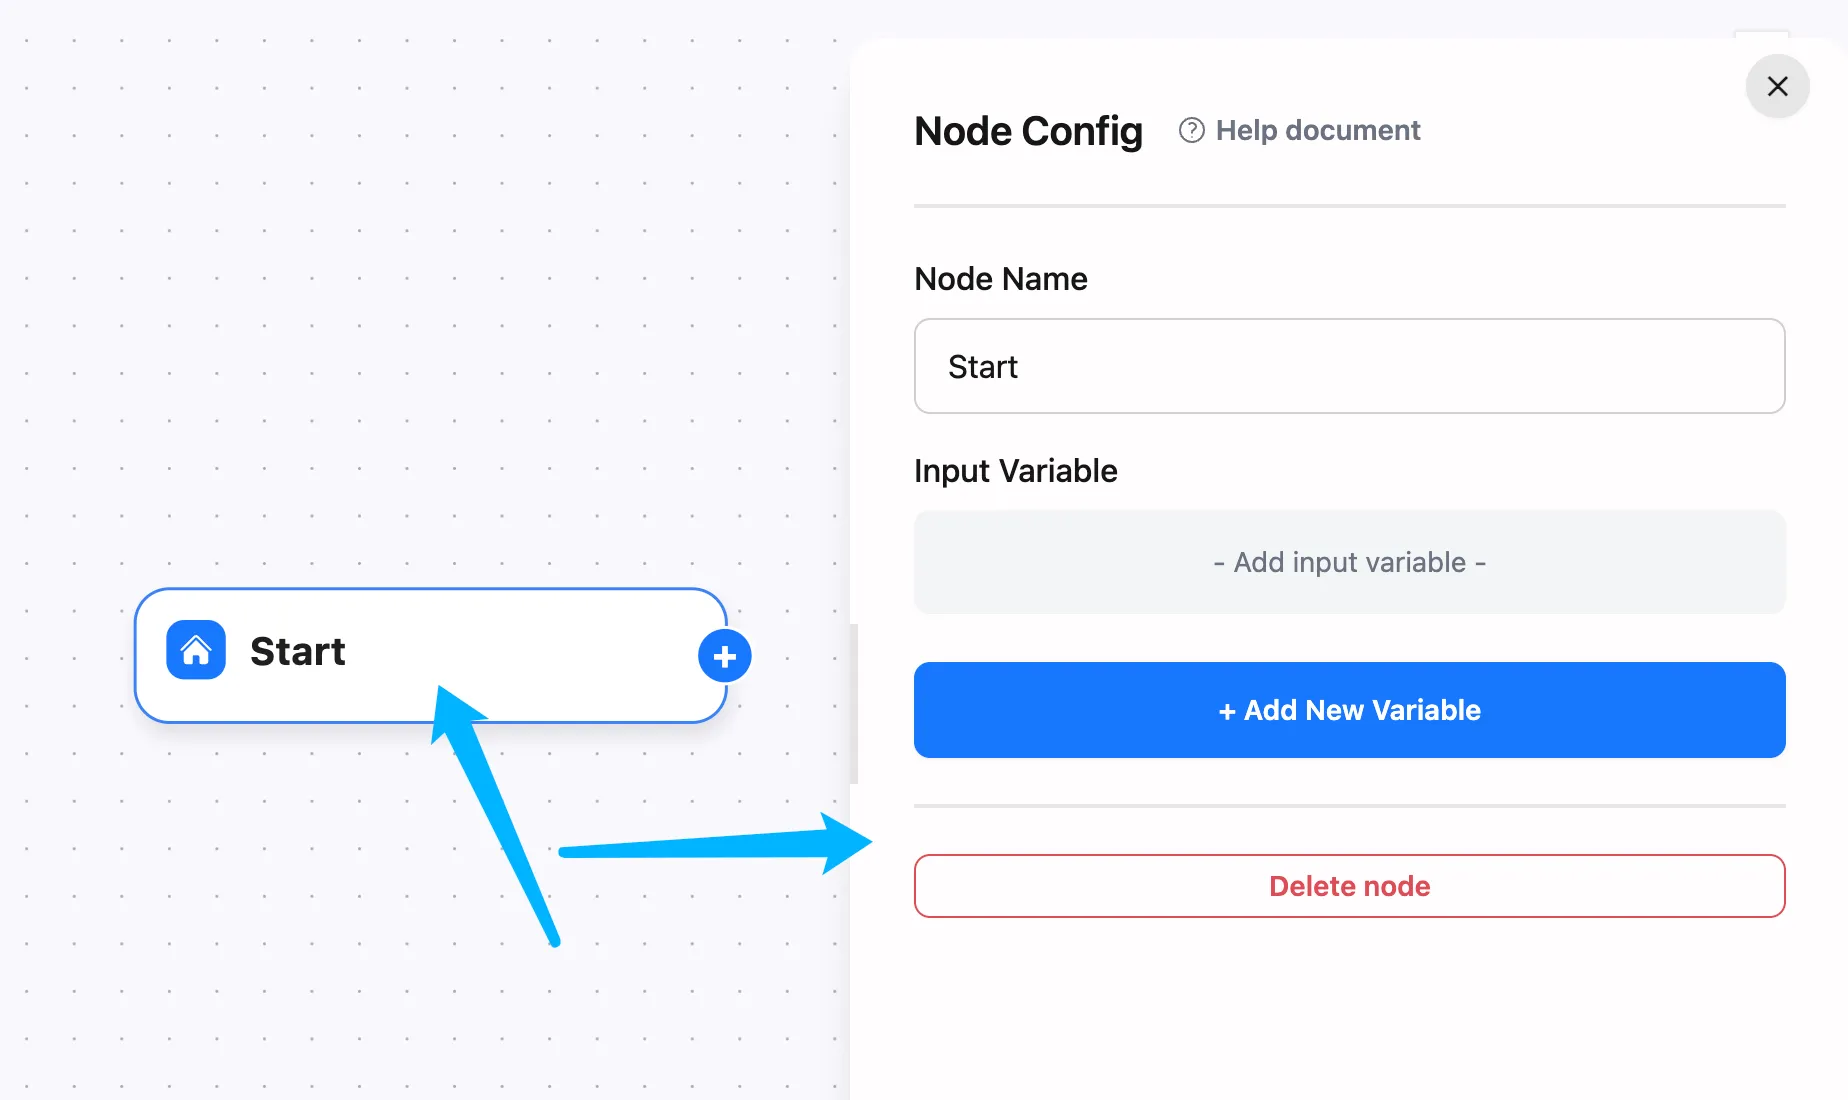
2.2 Workflow Panel
The workflow editor interface contains:
- 1: Input Node - Mandatory starting point (cannot be deleted)
- 2: Canvas controls (zoom, lock, etc.)
- 3: Node map overview
- 4: Save/Debug buttons
- 5: Node addition button (available after most nodes)

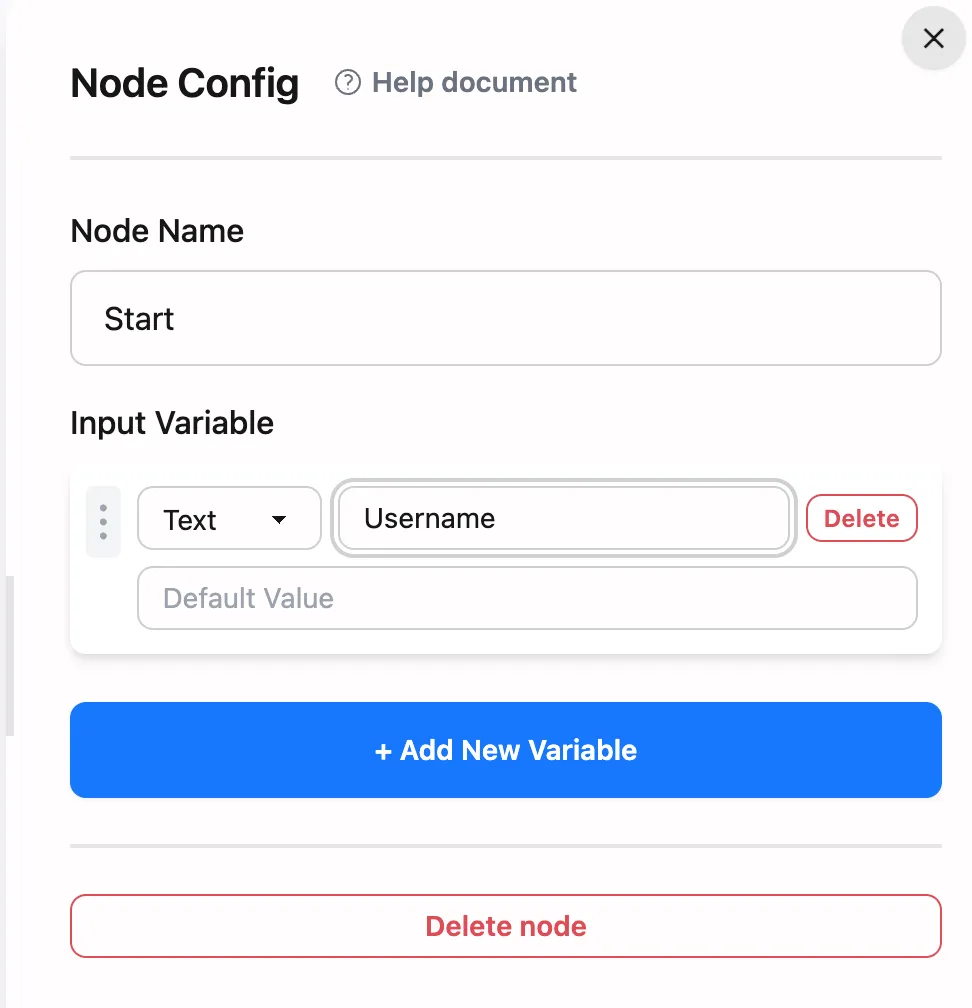
2.3 Configure Input Node
The Input Node is workflow’s entry point. Click it to edit properties:
Add a new input field Username:
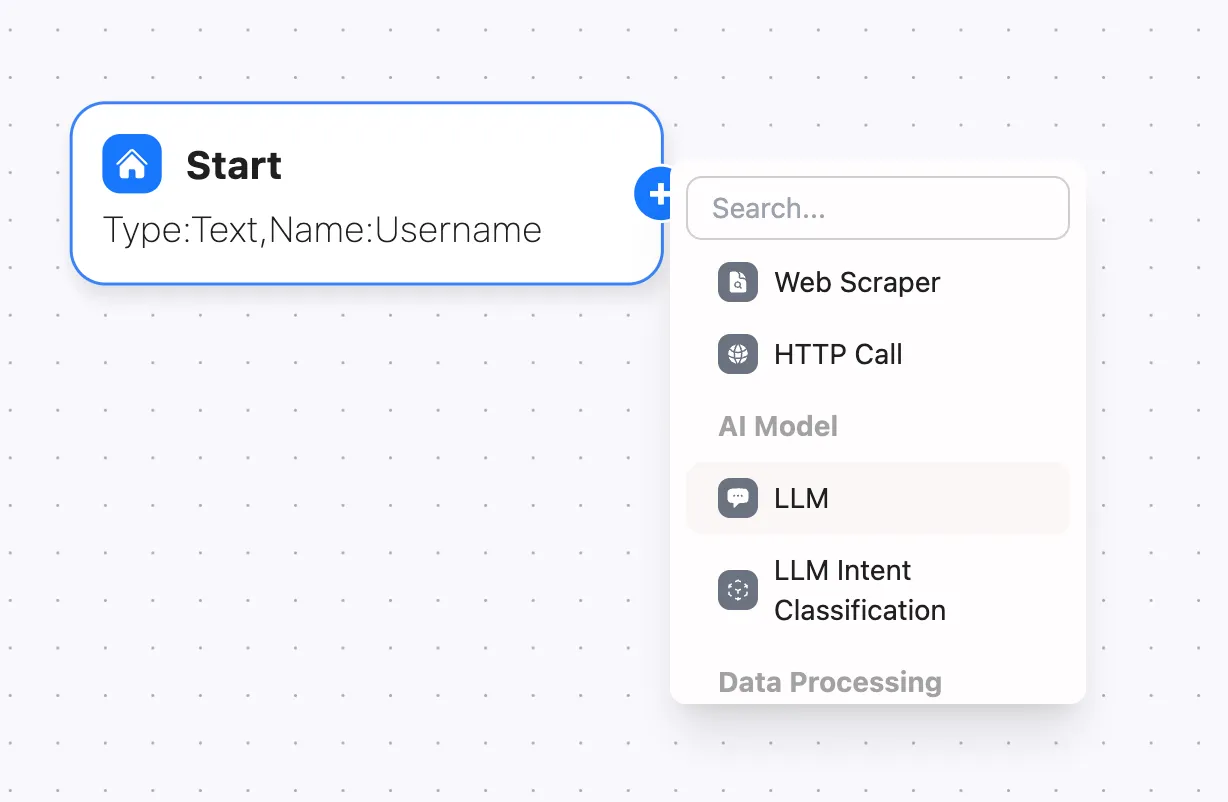
2.4 Add LLM Node
Click + after Input Node and select LLM:
Configure the LLM Node:
- Select
GPT-4o - Set Prompt:
I'm $Start.Username, say hello to me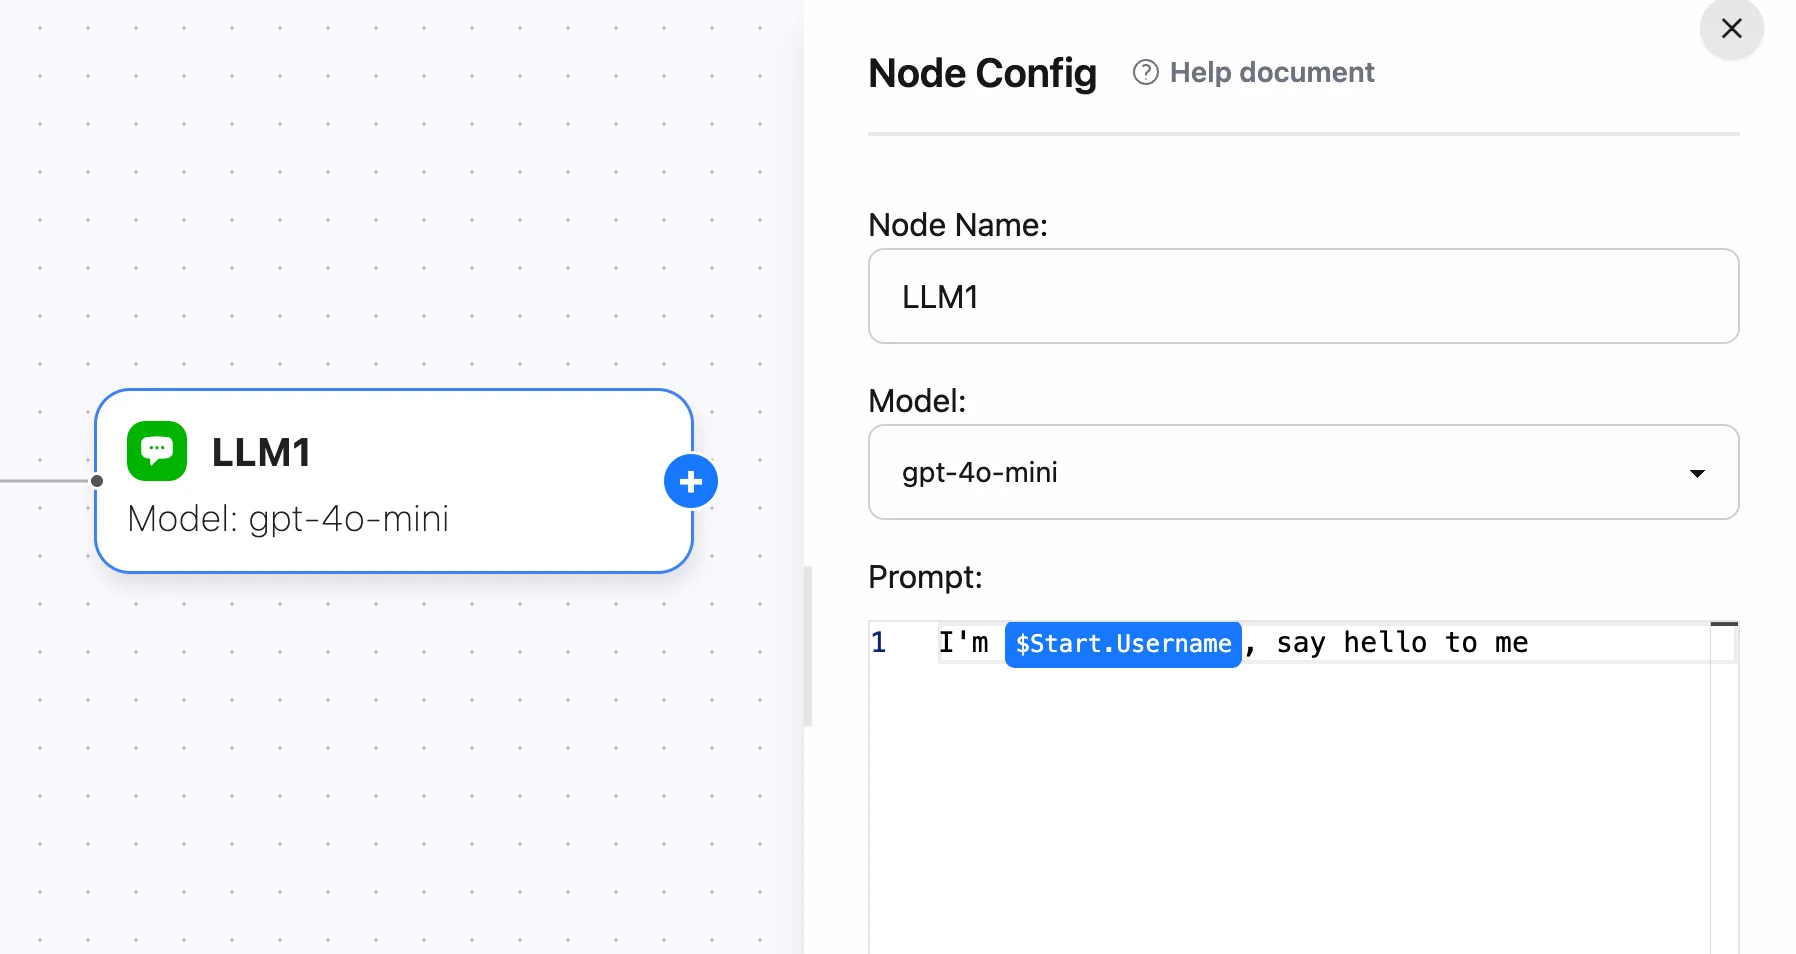
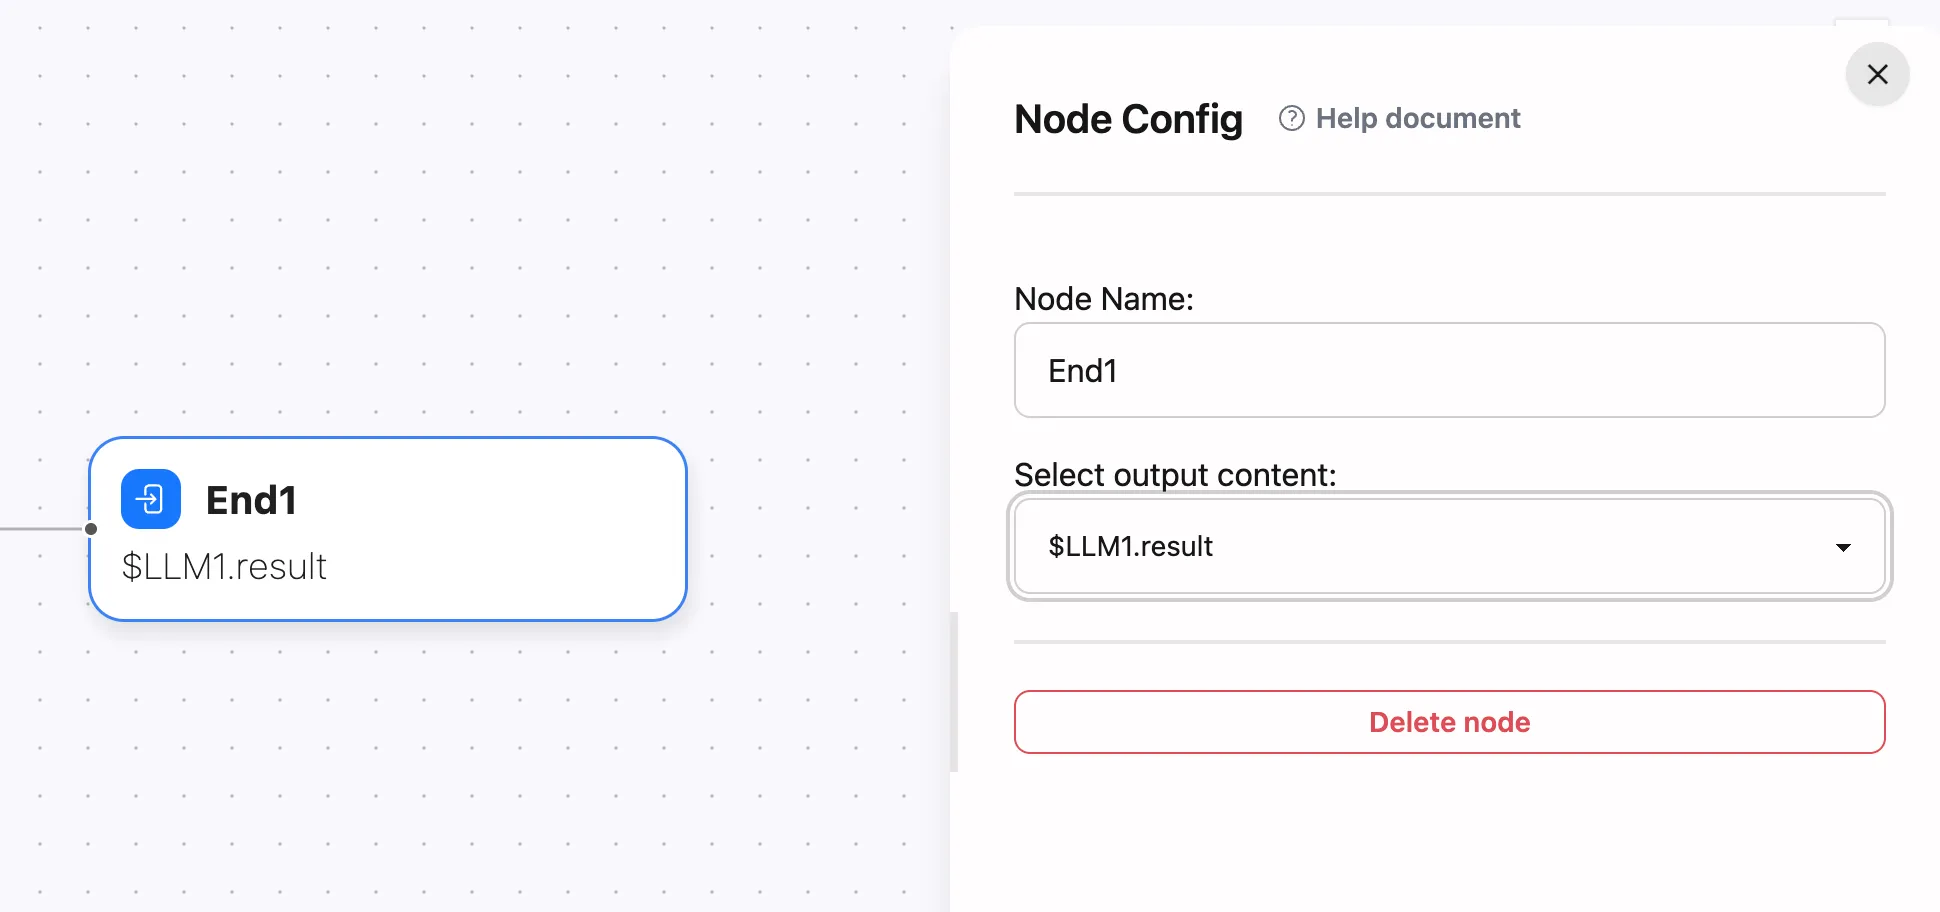
2.5 Add Output Node
Add Output Node after LLM Node. Set output to LLM1.result:
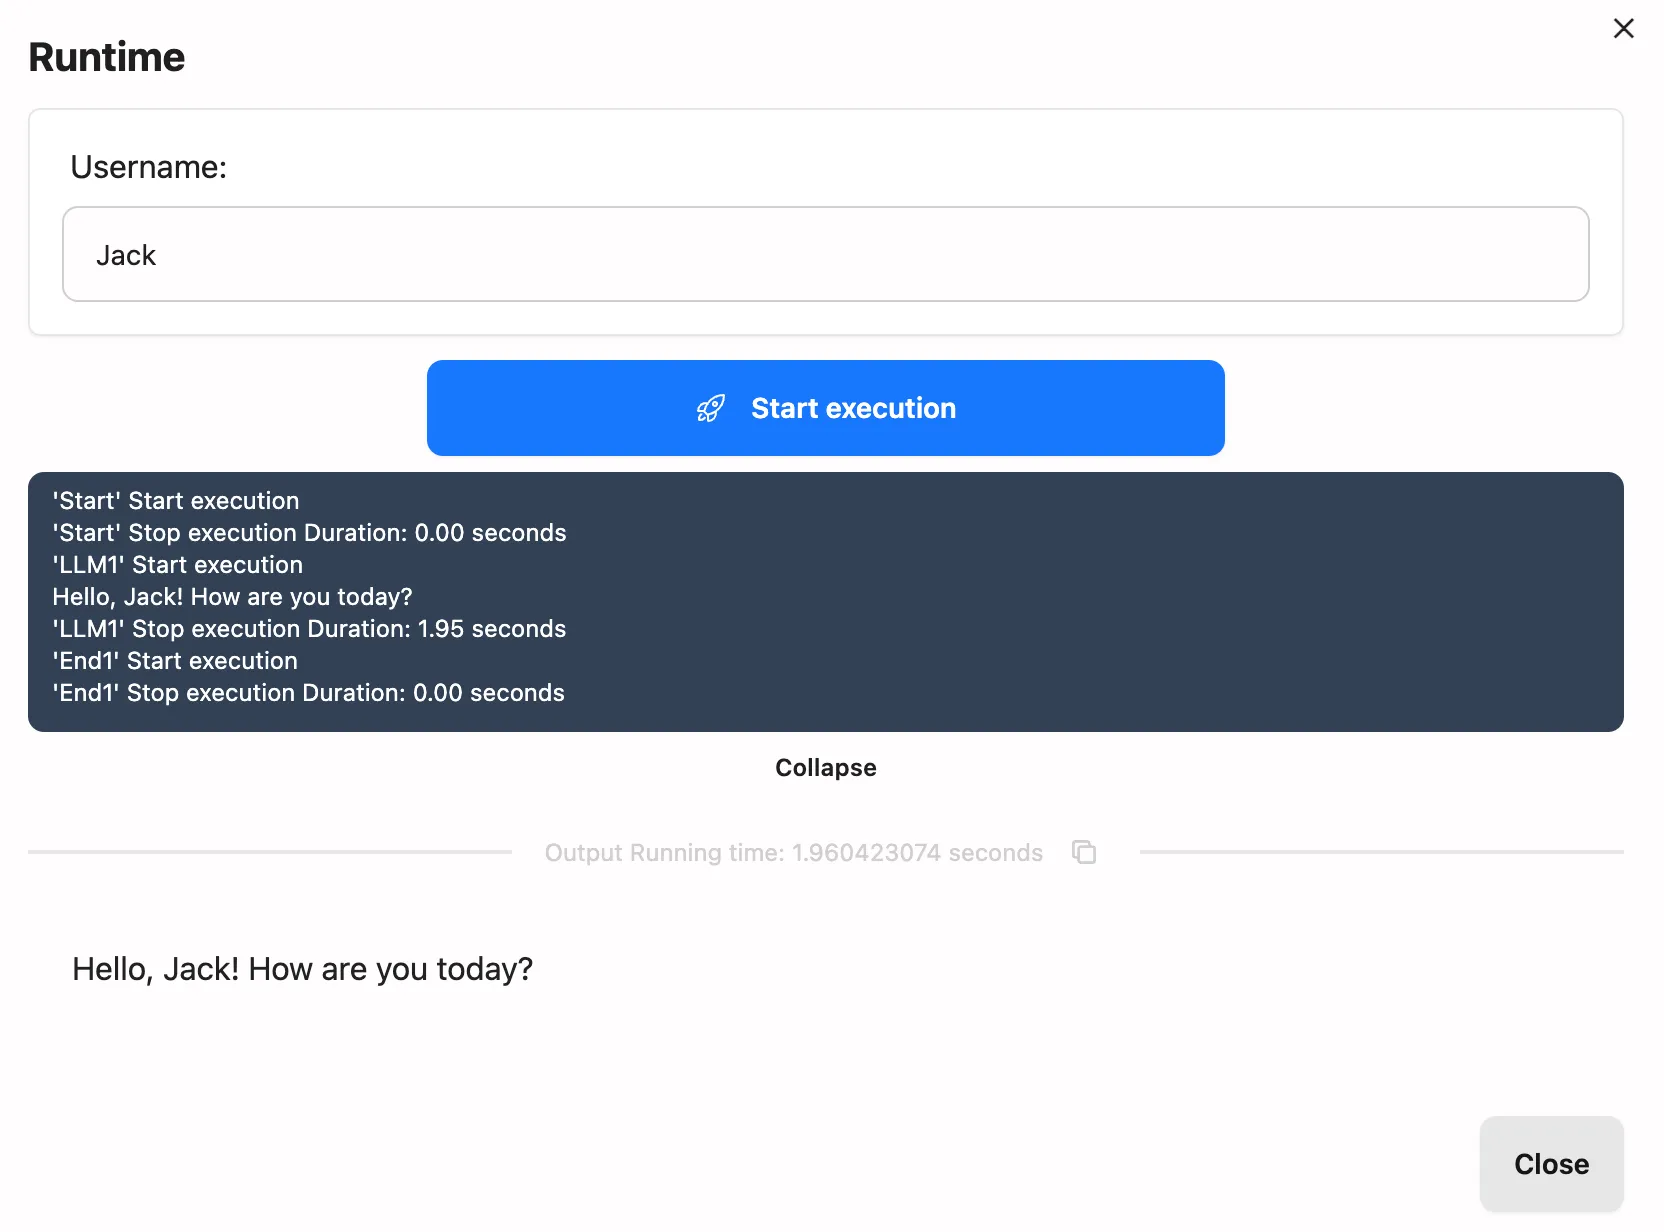
3. Test & Debug Workflow
Click Debug button and enter test values (e.g. Username: Jack):
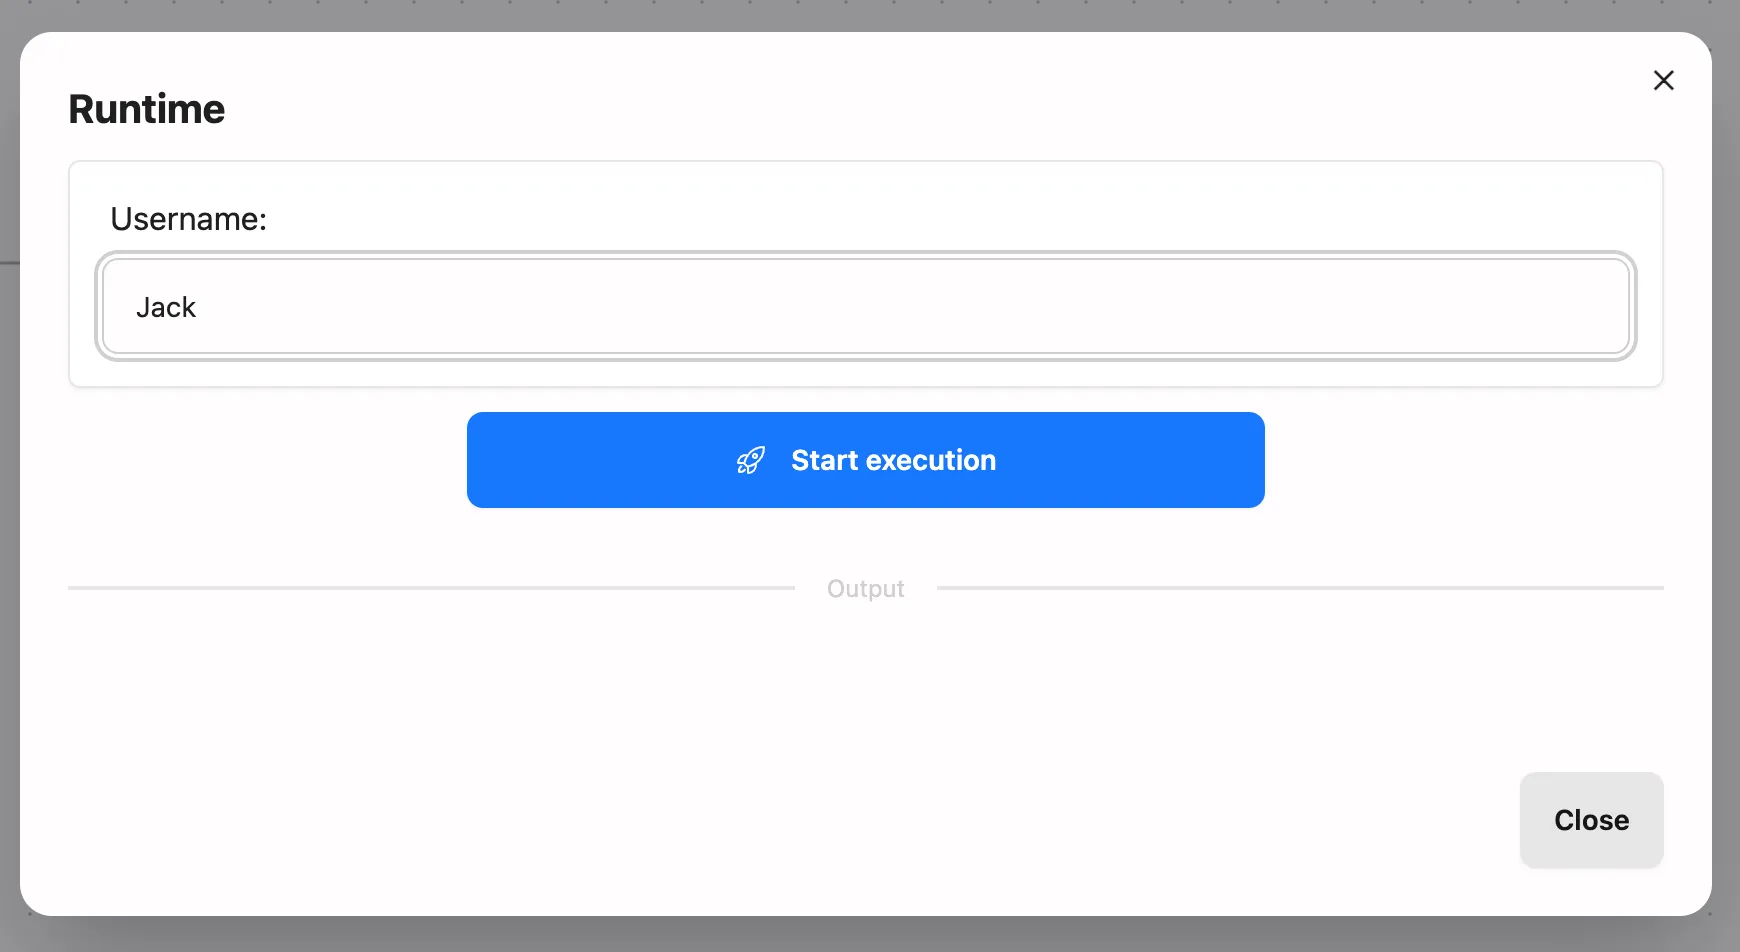
And click Start Execution button to see the result:
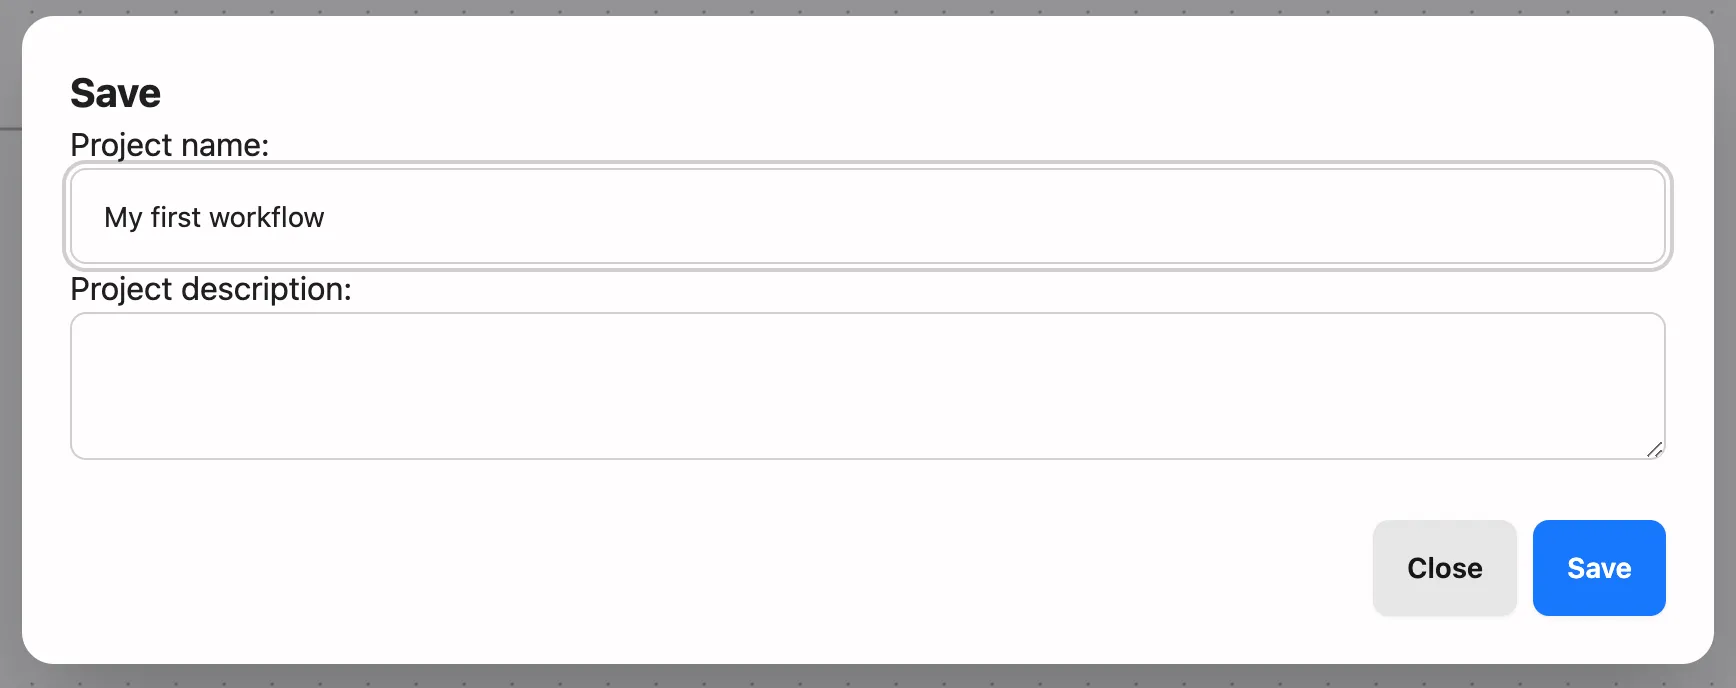
4. Save & Deploy
Click Save to store your workflow:
5. Manage Workflows
And then you can access saved workflows in the Workflow List:
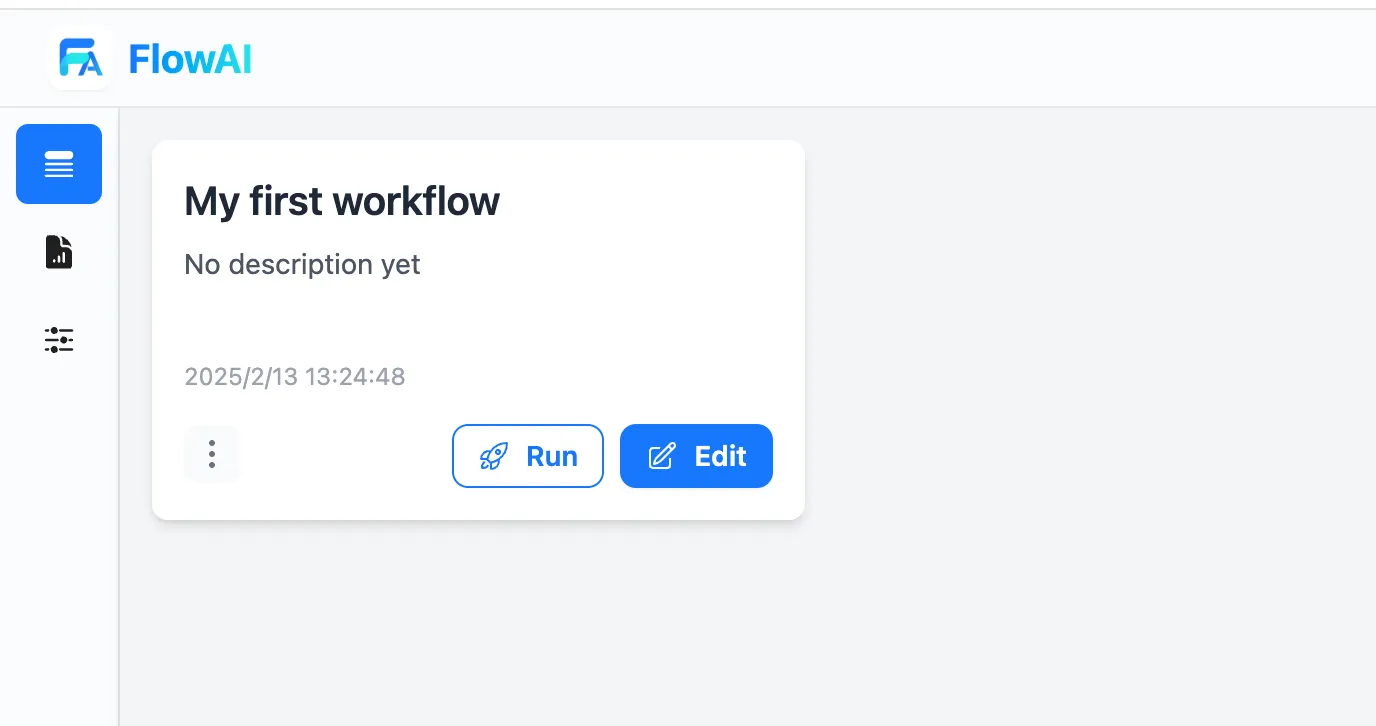
If you want to run the workflow without editing, you can click Run button.
FAQ
Q1: How to choose LLM model?
A: GPT-4o for general use. Consider cost-effectiveness - DeepSeek models offer similar performance at lower cost.
Q2: Can I share workflows?
A: Not currently supported (coming soon).
Q3: How to monitor workflows?
A: Check Logs in dashboard. Every execution will create a log(but debug mode will not).
Pro Tips
- Use variable templates for dynamic content
- Configure conditional branching
- Set up scheduled automation
Need a Custom AI Agent?
Custom AI agents designed for real-world business operations.